Product photography is one of the most important visual elements of an e-commerce store. When customers cannot physically touch, hold, or examine a product, photographs become one of the primary ways they evaluate what they are buying. A strong product image can communicate quality, size, texture, color, design, materials, and overall presentation within a few seconds.
For an online store, product photography is not simply about taking attractive pictures. It is about creating images that are clear, consistent, accurate, fast-loading, and persuasive. The right photography can help customers understand products better, reduce uncertainty, improve product-page engagement, and support a more professional brand identity.
This becomes even more important for Shopify stores, WooCommerce websites, marketplaces, fashion brands, beauty businesses, electronics stores, food brands, furniture companies, and other businesses that depend heavily on online product presentation.
In this guide, we will cover practical e-commerce product photography tips, including lighting, backgrounds, camera settings, composition, product angles, image dimensions, color accuracy, mobile presentation, image optimization, lifestyle photography, consistency, and SEO considerations.
Why Product Photography Matters for E-Commerce
When someone visits a physical store, they can examine a product from different angles, compare its size with nearby objects, inspect its material, and sometimes try it before purchasing. Online shoppers do not have the same physical experience.
Product photography helps bridge that gap.
A good product image can answer questions that customers might otherwise have before purchasing:
- What does the product actually look like?
- What color is it?
- What is its shape and size?
- What material does it appear to use?
- How does the product look from different angles?
- What details are included?
- How does it look when used?
- What does the packaging look like?
The more effectively your product photography answers these questions, the less uncertainty the shopper has to overcome before making a purchasing decision.
Product Photography Is Part of Your Brand
Your product images do not exist independently from the rest of your website. They contribute directly to how customers perceive your brand.
Imagine two online stores selling similar products. The first uses inconsistent photographs with different backgrounds, poor lighting, incorrect colors, and varying image dimensions. The second uses clean photography with consistent lighting, professional composition, detailed close-ups, and lifestyle images.
Even before reading the product descriptions, customers may perceive the second business as more professional.
This is why product photography should be considered part of your visual brand identity, not simply a technical requirement for uploading products.
1. Use Good Lighting
Lighting is arguably the most important technical factor in product photography. A good camera cannot completely compensate for poor lighting.
Professional product photography generally aims for controlled, consistent lighting that reveals the product clearly without creating distracting shadows, blown-out highlights, or incorrect colors.
For many products, soft and diffused light works extremely well because it creates smoother shadows and reduces harsh reflections.
Natural Light
Natural window light can be an excellent starting point for small businesses and beginners. Place the product near a large window and use a white surface or reflector to control shadows.
Avoid placing the product under direct, extremely harsh sunlight unless that specific lighting style is part of the creative direction.
Overcast daylight can be particularly useful because clouds naturally diffuse sunlight and create softer illumination.
Artificial Lighting
Artificial lighting provides more control and repeatability. Continuous LED lights, softboxes, strip lights, and other controlled lighting systems can help you reproduce a similar visual appearance across an entire product catalog.
For a professional e-commerce catalog, consistency is extremely valuable because customers should not feel like every product was photographed by a different person under completely different conditions.
2. Use a Clean Background
For standard product images, a clean background helps customers focus on the product itself.
White or neutral backgrounds are common in e-commerce because they create a simple visual environment and make products easier to compare.
A clean background can also make product images easier to integrate into Shopify product pages, collection grids, marketplaces, advertisements, and other digital layouts.
However, a plain white background is not mandatory for every type of photography. Lifestyle photography can use environments that communicate how and where a product is used.
A useful strategy is to combine clean product images with lifestyle images rather than choosing only one approach.
3. Keep Your Product Centered and Clearly Visible
The main product should usually be easy to identify immediately. Avoid compositions where the product is unnecessarily small, partially hidden, or surrounded by distracting objects.
For standard catalog images, leave enough space around the product to prevent awkward cropping while still allowing the product to occupy a useful portion of the frame.
Remember that product images are often displayed as small thumbnails on collection pages and mobile screens. Fine details that look obvious in a large original photograph may disappear when the image is reduced.
4. Photograph Multiple Angles
One photograph rarely tells the complete story of a physical product.
Whenever appropriate, provide multiple views that allow customers to inspect the product from different perspectives.
Depending on the product, useful angles may include:
- Front view.
- Back view.
- Side view.
- Three-quarter view.
- Top view.
- Bottom view when relevant.
- Close-up detail.
- Packaging view.
- Product-in-use view.
For products with important physical details, close-up photographs can be particularly valuable.
5. Show Important Product Details
If a product has a feature that differentiates it from competitors, make sure customers can actually see it.
For example, a fashion brand might highlight stitching, fabric texture, buttons, embroidery, or material quality. A technology brand might show ports, controls, screen details, or included accessories. A furniture business might highlight wood grain, finishing, joints, or upholstery.
Do not rely entirely on written descriptions to explain visually important features.
If something matters to the buying decision, consider showing it visually.
6. Maintain Accurate Product Colors
Color accuracy is especially important for fashion, beauty, home decor, furniture, accessories, and other products where customers expect the item they receive to look similar to the photograph.
Different lighting conditions can dramatically change the appearance of colors. Warm indoor lighting can make products appear more yellow or orange, while certain artificial lights can create green or blue color casts.
Use consistent lighting and white balance throughout the photography process. During editing, avoid dramatically changing the product's actual color simply to make the photograph look more attractive.
A beautiful photograph that misrepresents the actual product can create customer dissatisfaction.
7. Use a Consistent Photography Style
Consistency is one of the easiest ways to make an e-commerce catalog look more professional.
Try to maintain consistent:
- Background style.
- Lighting direction.
- Camera angle.
- Product scale within the frame.
- Image dimensions.
- Color treatment.
- Shadow style.
- Editing approach.
For example, if one product occupies 80% of the frame and another occupies only 35%, the product grid can look visually inconsistent even if both photographs are technically high quality.
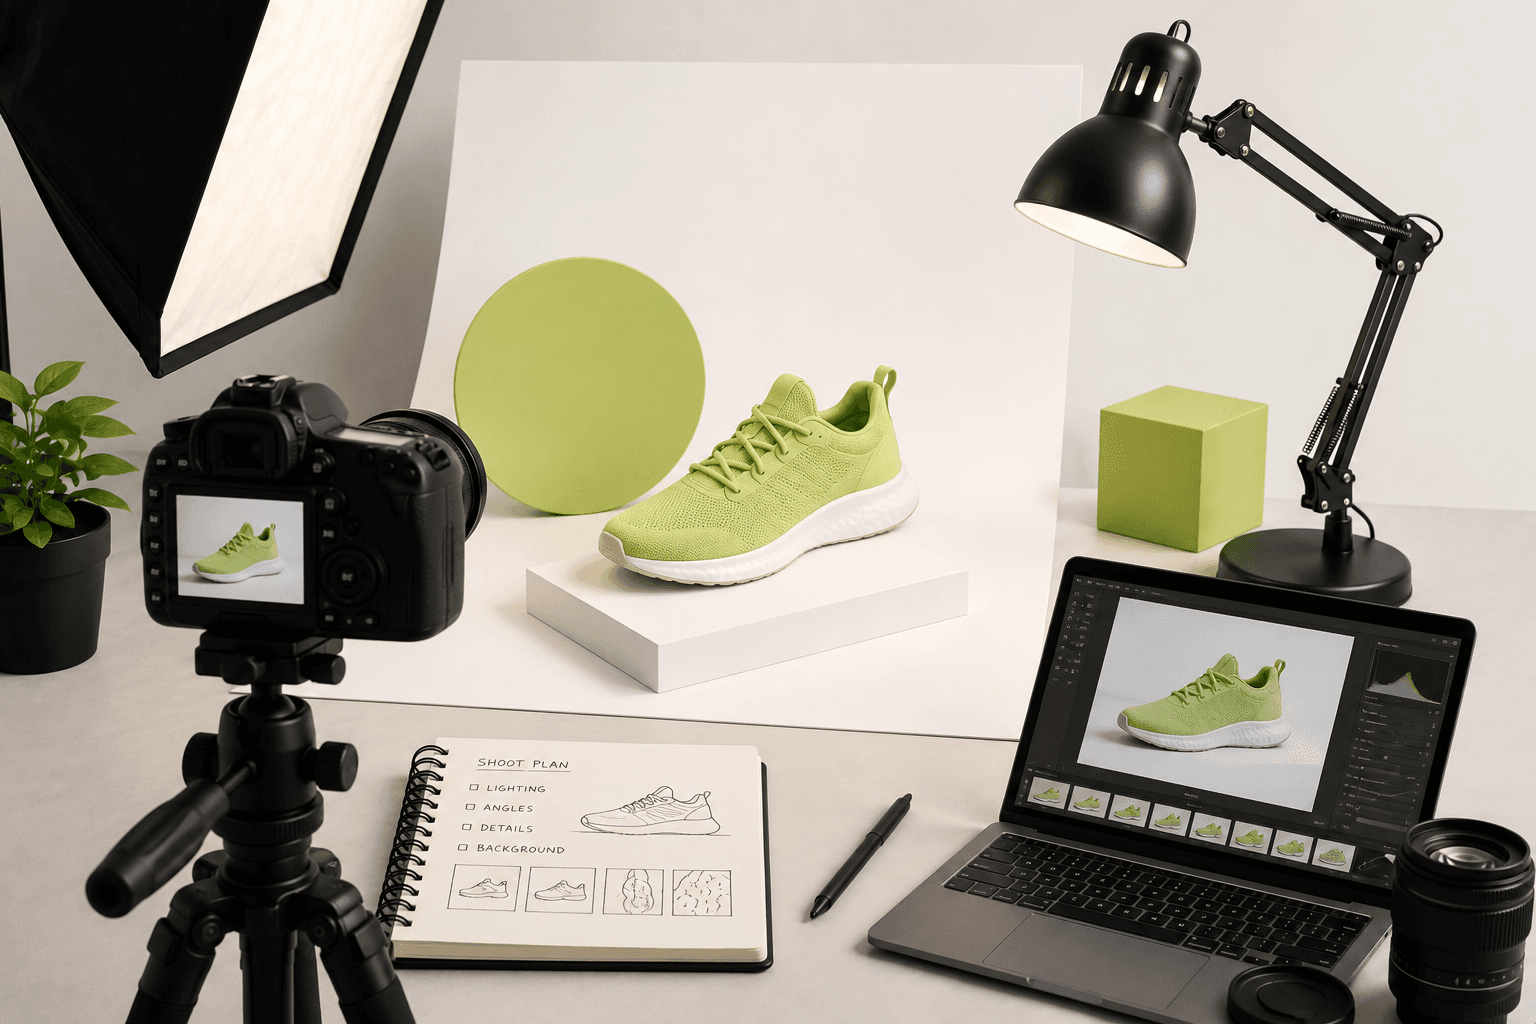
8. Create a Standard Product Photography Setup
If you photograph products regularly, create a repeatable setup rather than starting from scratch every time.
Your setup could include:
- Camera or high-quality smartphone.
- Tripod.
- Softbox or continuous light.
- Reflector.
- Neutral background.
- Product stand or support.
- Cleaning materials.
- Color reference tools when necessary.
- Editing software.
A repeatable setup makes it easier to photograph dozens or hundreds of products with a consistent appearance.
9. Clean the Product Before Photographing It
Small imperfections can become extremely noticeable in high-resolution product photography.
Before taking photographs, inspect the product for:
- Dust.
- Fingerprints.
- Smudges.
- Loose threads.
- Scratches.
- Wrinkles.
- Packaging damage.
Cleaning the product before photography can save considerable editing time later.
For reflective products such as watches, glass bottles, electronics, and polished surfaces, fingerprints and dust can be particularly obvious.
10. Use a Tripod for Consistency
A tripod is not required for every photography style, but it can be extremely useful for standard e-commerce product photography.
It keeps the camera position stable and makes it easier to reproduce the same framing across multiple products.
A stable camera can also make it easier to work with lower ISO settings and slower shutter speeds when lighting conditions require them.
11. Choose the Right Camera Settings
You do not necessarily need an expensive camera to create effective e-commerce product photography. Lighting, composition, product preparation, and editing often have a larger impact than simply upgrading camera equipment.
When using a dedicated camera, consider settings such as:
- Low ISO to reduce unnecessary image noise.
- Aperture appropriate for the required depth of field.
- Shutter speed appropriate for the lighting setup.
- Accurate white balance.
- Manual focus where appropriate.
- RAW capture when extensive post-processing is required.
The ideal settings depend on the product, lens, lighting setup, camera, and desired visual style.
12. Pay Attention to Depth of Field
Depth of field determines how much of the image appears sharp.
A shallow depth of field can create attractive lifestyle photographs, but it may not always be appropriate for standard product images.
If customers need to inspect the entire product, excessive background blur can make important areas appear soft.
For technical products, accessories, jewelry, electronics, and detailed objects, make sure the important parts of the product remain sufficiently sharp.
13. Use Lifestyle Product Photography
Clean catalog photographs explain what the product looks like. Lifestyle photographs can help customers imagine how the product fits into their life.
For example:
- A sofa photographed inside a beautifully designed living room.
- A watch photographed on someone's wrist.
- A skincare product photographed inside a bathroom setup.
- A laptop photographed on a modern work desk.
- A clothing item photographed on a model.
- A coffee product photographed alongside a prepared cup.
Lifestyle images can communicate context, mood, scale, and use cases that a simple isolated product photograph cannot always communicate.
14. Show the Product in Use
Whenever possible, demonstrate how the product is used.
This can be particularly effective for products where functionality is difficult to understand from a static front-facing photograph.
For example, a bag could be photographed being carried, a kitchen tool could be shown during food preparation, or a piece of furniture could be shown in an actual room.
The objective is to help customers understand the product beyond its appearance.
15. Show Scale Clearly
One common problem with online shopping is uncertainty about product size.
A product may look large in a photograph simply because it occupies most of the frame.
Consider including a lifestyle image or another visual reference that helps customers understand scale.
For example, showing a handbag being carried by a person can communicate its approximate size much more naturally than a photograph of the bag floating against a white background.
16. Photograph Packaging and Accessories
If packaging, cables, cases, manuals, attachments, or other accessories are included with the product, consider showing them clearly.
This can reduce confusion about what customers receive after purchasing.
For products where the packaging is part of the brand experience, such as cosmetics, luxury goods, gifts, and premium electronics, packaging photography can also reinforce the perceived value of the product.
17. Use Close-Up Detail Images
Close-up photography is particularly useful for products where texture and craftsmanship matter.
Examples include:
- Leather goods.
- Jewelry.
- Clothing.
- Wooden furniture.
- Handmade products.
- Cosmetics.
- Watches.
- Premium accessories.
Close-ups can help customers understand material quality and small design details that may disappear in a standard product image.
18. Avoid Excessive Props
Props can make lifestyle photography more interesting, but they should not overpower the product.
A common mistake is creating a beautiful scene where the customer has difficulty identifying what is actually being sold.
Use props to support the story rather than compete with the product.
19. Use Proper Image Dimensions
There is no single image dimension that is perfect for every e-commerce store. The correct dimensions depend on your theme, product layout, zoom functionality, marketplace requirements, and responsive design.
However, it is important to establish a consistent aspect ratio and export strategy across your catalog.
Square images are commonly used for product grids because they work well across many responsive layouts. Portrait images can be especially useful for fashion, while landscape images may be appropriate for certain products and lifestyle compositions.
Before choosing a fixed size, check how your actual storefront displays product media on desktop and mobile.
20. Optimize Product Images for Website Performance
High-quality photography is valuable, but unnecessarily large image files can slow down your website.
This is particularly important for e-commerce websites because product pages can contain multiple large images.
Image optimization should balance:
- Visual quality.
- Image dimensions.
- File size.
- Format.
- Browser support.
- Responsive delivery.
Modern formats such as WebP and AVIF can provide efficient image compression when supported by your delivery system.
Do not upload a massive original camera file simply because the platform accepts it. Resize the image according to the actual display requirements of your website.
21. Product Photography and Core Web Vitals
Product images can have a direct impact on website performance metrics, especially Largest Contentful Paint (LCP).
If the primary product image becomes the largest visible element on a product page, its file size, dimensions, delivery priority, and loading behavior can influence how quickly the main content becomes visible.
This means product photography and web development should not be treated as completely separate processes.
Optimized photography combined with responsive image delivery can help create a better balance between visual quality and performance.
If your Shopify store needs technical performance improvements alongside better product presentation, you can explore the Shopify Development service.
22. Do Not Sacrifice Quality for File Size
Image optimization does not mean compressing every photograph until it looks visibly damaged.
Product photography is directly connected to customer perception, so aggressive compression can work against your business goals.
Instead, test different export settings and choose the smallest file that still maintains the visual quality required for the product.
The right balance depends on the image, dimensions, format, and display size.
23. Create Images for Mobile First
A significant portion of e-commerce browsing happens on smartphones, so product photography should be evaluated on small screens as well as large monitors.
Open your product page on an actual phone and ask:
- Can I immediately identify the product?
- Are important details visible?
- Is the product large enough?
- Does the image crop correctly?
- Can I zoom when necessary?
- Does the image load quickly?
An image that looks perfect on a large desktop monitor may not communicate the same information when reduced to a small mobile viewport.
24. Use Product Image Galleries Properly
The order of your product images matters.
Usually, the first image should be the clearest and most representative view of the product. Additional images should then answer questions that the first image cannot.
A useful product gallery might follow this structure:
- Main product image.
- Alternative angle.
- Back or side view.
- Important detail close-up.
- Product-in-use photograph.
- Scale reference.
- Packaging or accessories.
The exact order should depend on the product category and customer buying journey.
25. Use Image Alt Text for Accessibility and SEO
Product images should have meaningful alternative text when appropriate.
Alt text helps communicate the purpose or content of an image to users who cannot see it, including people using screen readers.
It can also provide search engines with additional contextual information about an image, although alt text should primarily be written for accessibility rather than as a keyword-stuffing technique.
For example:
<img src="/images/black-leather-wallet.webp" alt="Black leather bifold wallet with card slots" />Avoid writing something unnatural such as:
<img alt="best wallet leather wallet cheap wallet buy wallet online" />Descriptive and natural language is much better.
26. Use Descriptive File Names
Before uploading product images, use descriptive file names where practical.
For example:
black-leather-wallet.webp
minimalist-black-wallet-front.webp
black-leather-wallet-interior.webp
Avoid unnecessarily generic names such as:
IMG_4928.jpg
DSC_0192.jpg
product-final-final2.jpg
Descriptive file naming can improve organization and provide useful contextual information, although it should not be treated as a shortcut to ranking in image search.
27. Avoid Keyword Stuffing in Image SEO
SEO does not mean repeating the same keyword everywhere.
If you are selling a black leather wallet, an appropriate file name and alt attribute can naturally describe the image. There is no need to repeat "best black leather wallet online" several times in the image metadata.
Search engines are increasingly capable of understanding context, and accessibility should remain the primary purpose of alternative text.
28. Use Photography to Reduce Product Uncertainty
One of the biggest advantages of strong product photography is its ability to reduce uncertainty.
Customers often hesitate when they cannot determine the product's size, material, finish, color, shape, or functionality.
Instead of adding endless paragraphs to your product description, consider whether a photograph can communicate the information more effectively.
A well-designed image can sometimes explain something in seconds that would otherwise require several paragraphs.
29. Show Different Product Variants
If a product is available in multiple colors, finishes, sizes, or configurations, photographs should accurately represent those variations.
For color variants, use separate images whenever the visual differences are important.
Customers should not have to guess what a selected color looks like based on a tiny color swatch.
This is particularly important for fashion, cosmetics, furniture, accessories, and other visually driven categories.
30. Photograph Reflective Products Carefully
Reflective products can be significantly more difficult to photograph than matte objects.
Glass, polished metal, watches, jewelry, electronics, and glossy packaging can reflect the photographer, camera, lights, room, and surrounding objects.
Large soft light sources, careful positioning, flags, diffusers, and controlled environments can help create cleaner reflections.
Do not rely solely on aggressive editing to remove reflections. Controlling the lighting during photography often produces a much better result.
31. Photograph Transparent Products Carefully
Transparent products such as glass containers, bottles, acrylic products, and clear accessories require careful control of background and lighting.
A transparent object can disappear against a similarly bright background, while excessive contrast can make it look unnatural.
Use lighting and background separation to make the shape of the product clearly visible.
32. Use Models for Fashion Products
For clothing, accessories, footwear, and wearable products, model photography can provide information that isolated product images cannot.
Customers can see how the product fits, how it falls on the body, how it looks when worn, and how it interacts with other clothing or accessories.
For apparel stores, consider combining:
- Front product photograph.
- Back product photograph.
- Detail close-up.
- Model photograph.
- Fabric or texture photograph.
- Size and fit information.
33. Use a Color Reference When Accuracy Is Critical
For brands where color accuracy is particularly important, using a color reference during the photography workflow can help establish a more consistent editing process.
This is especially useful when photographing a large catalog over multiple days or under changing lighting conditions.
Color management becomes more important as your photography workflow becomes more professional and the same products need to look consistent across websites, packaging, advertising, and print materials.
34. Do Not Over-Edit Product Images
Editing should improve the photograph without changing what the customer is actually buying.
Useful editing tasks may include:
- Exposure correction.
- White balance correction.
- Contrast adjustment.
- Color correction.
- Background cleanup.
- Dust removal.
- Minor retouching.
- Cropping.
- Image resizing.
- Compression.
Be careful with excessive saturation, sharpening, skin retouching, artificial shadows, or color changes that make the product look significantly different from reality.
35. Create a Photography Checklist
A simple checklist can prevent expensive mistakes when photographing large product catalogs.
Before shooting, check:
- Is the product clean?
- Is the background ready?
- Is the lighting consistent?
- Is the camera stable?
- Is the product positioned correctly?
- Is the color accurate?
- Are important details visible?
- Have all required angles been photographed?
- Have lifestyle photographs been captured?
- Has packaging been photographed?
After shooting, check:
- Are the photographs sharp?
- Are there distracting reflections?
- Is the exposure correct?
- Does the product look realistic?
- Are all images consistent?
- Are dimensions appropriate?
- Are file sizes optimized?
- Are file names descriptive?
- Is appropriate alt text available?
36. Product Photography for Shopify Stores
Shopify stores depend heavily on product media because photographs are displayed throughout product pages, collection pages, search results, recommendations, cart experiences, and other storefront components.
A strong Shopify product photography system should therefore consider both visual quality and technical performance.
Product images should be consistent, properly sized, optimized for responsive layouts, and presented in a gallery that makes it easy for customers to explore the product.
For Shopify merchants, improving photography can be particularly valuable when combined with a properly structured product page, clear product information, persuasive calls to action, and a fast storefront.
If your Shopify store needs custom theme development, product-page improvements, responsive design, or performance optimization, explore the Shopify Development service.
37. Product Photography for WooCommerce and WordPress
WordPress and WooCommerce stores also depend heavily on product media. The same principles apply: consistent photography, appropriate image dimensions, descriptive metadata, optimized file sizes, and responsive delivery.
A WooCommerce store with hundreds of products can quickly accumulate thousands of large image files, so establishing an image workflow early can make ongoing maintenance much easier.
If your WordPress website requires custom development, WooCommerce functionality, or a performance-focused implementation, you can explore the WordPress Development service.
38. Product Photography and Conversion Optimization
Product photography should ultimately support the customer's decision-making process.
Instead of asking only, "Does this image look beautiful?", ask:
- Does it explain the product?
- Does it show the important features?
- Does it communicate quality?
- Does it show scale?
- Does it reduce uncertainty?
- Does it work on mobile?
- Does it load quickly?
- Does it match the brand?
A photograph can be visually impressive but commercially ineffective if it does not help customers understand what they are purchasing.
39. Use A/B Testing When Possible
If your store receives enough traffic, you can experiment with different product-image approaches.
For example, you might compare:
- Standard product image versus lifestyle image.
- Different first-image compositions.
- Different image ordering.
- Different crop styles.
- Different gallery layouts.
Do not assume that the most visually attractive version will always generate the best business results. Use analytics and experimentation where practical.
40. Photography and Graphic Design Work Together
Photography does not always need to exist completely on its own. Product photographs can become part of banners, promotional graphics, social media campaigns, advertisements, email marketing, packaging, and other brand assets.
Professional product photography combined with thoughtful graphic design can create a consistent visual system across multiple marketing channels.
If your brand also needs visual assets, you can explore the Graphic Design service for custom digital design and brand-focused creative work.
41. Create a Product Photography Style Guide
If multiple people are photographing products for your business, create a simple photography style guide.
Your guide can document:
- Preferred background.
- Lighting direction.
- Camera height.
- Product position.
- Crop style.
- Aspect ratio.
- Shadow treatment.
- Color treatment.
- File naming convention.
- Export format.
- Maximum image dimensions.
- Alt-text approach.
This makes it much easier to maintain consistency as the catalog grows.
42. Think About the Entire Customer Journey
The product image is not isolated from the rest of the buying experience.
A customer may discover your product through Google, Instagram, an advertisement, a marketplace, or a direct visit. They may then land on a collection page, open a product page, inspect the gallery, read the description, select a variant, add the product to their cart, and proceed to checkout.
Your photography should remain visually consistent throughout this journey.
A strong product photograph used in an advertisement should lead naturally to a product page containing equally strong imagery.
43. Use Photography to Strengthen Product Descriptions
Text and images should complement each other.
If your product description says that a bag contains multiple internal compartments, show the inside of the bag. If a chair has a special texture, provide a close-up. If a device includes specific ports, photograph them.
This creates a stronger connection between what you claim and what customers can actually see.
44. Avoid Common E-Commerce Photography Mistakes
Some photography mistakes appear repeatedly across online stores.
- Using blurry images.
- Using inconsistent backgrounds.
- Showing only one angle.
- Using incorrect colors.
- Uploading unnecessarily huge files.
- Using generic stock photography instead of real product photographs.
- Over-editing images.
- Using distracting props.
- Failing to show product scale.
- Ignoring mobile presentation.
- Using meaningless image file names.
- Ignoring accessibility.
- Using the same photograph for every product variant.
Fixing these basic problems can often produce a noticeable improvement in the perceived quality of an online store.
45. Build a Repeatable E-Commerce Photography Workflow
For a growing online store, photography should become a process rather than an occasional task.
A practical workflow can look like this:
- Prepare and clean the product.
- Set up the background.
- Set up consistent lighting.
- Position the camera.
- Capture the primary product photograph.
- Capture alternative angles.
- Capture detail photographs.
- Capture lifestyle photographs where appropriate.
- Review the photographs.
- Color-correct and retouch.
- Crop and resize.
- Export in an appropriate format.
- Compress the images.
- Use descriptive file names.
- Add appropriate alt text.
- Upload and review on desktop and mobile.
A standardized process makes it easier to scale product photography without sacrificing consistency.
E-Commerce Product Photography Checklist
Before publishing a product, use this checklist:
- Primary product image is clear and sharp.
- Product is correctly exposed.
- Product color is accurate.
- Background is clean.
- Product is positioned consistently.
- Multiple angles are available.
- Important details have close-up images.
- Scale is communicated where necessary.
- Lifestyle image is included when useful.
- Packaging is shown when relevant.
- Product variants have accurate images.
- Images work well on mobile.
- Images are appropriately sized.
- Image files are compressed.
- Modern formats are used where appropriate.
- Descriptive file names are used.
- Alt text is meaningful and accessible.
- Product images do not cause unnecessary performance problems.
- Gallery order makes sense for the customer.
- Photography matches the brand's visual identity.
Final Thoughts
Great e-commerce product photography is about much more than taking a beautiful photograph. The best product images help customers understand what they are buying, visualize themselves using the product, inspect important details, understand scale, and feel more confident about their purchase.
Start with the fundamentals: good lighting, accurate colors, clean backgrounds, sharp images, consistent composition, useful angles, and clear product details.
Then consider the technical side. Resize images appropriately, use modern formats where suitable, compress files without destroying quality, provide meaningful alt text, and make sure your product media works well across desktop and mobile devices.
For Shopify and other e-commerce websites, photography should also be considered alongside page performance. Beautiful product images are valuable, but they should not become unnecessarily large resources that slow down the shopping experience.
Finally, remember that product photography is part of your brand. Consistent, professional imagery can make an online store feel more trustworthy and polished while giving customers the information they need to make better purchasing decisions.
If you need professional product photography for an e-commerce catalog, you can explore the Photography service by Built by Saurav. For businesses that also need a fast and conversion-focused storefront, explore the Shopify Development service. If your brand needs supporting banners, promotional creatives, or other visual assets, visit the Graphic Design service.
For a complete e-commerce project involving photography, design, development, and performance optimization, get in touch with Saurav and discuss your project requirements.
Frequently Asked Questions
What is the best background for e-commerce product photography?
A clean white or neutral background is commonly useful for standard product photography because it keeps attention on the product and works well across many e-commerce layouts. Lifestyle photographs can use more contextual backgrounds when the goal is to show how the product is used.
How many product photos should an e-commerce product have?
There is no universal number that works for every product. A useful product gallery should provide enough views to answer the customer's important questions. This may include a primary image, alternative angles, detail photographs, lifestyle imagery, scale references, and packaging photographs when relevant.
What is the best image format for e-commerce?
The best format depends on the storefront and delivery system. Modern formats such as WebP and AVIF can provide efficient compression, while JPEG and PNG remain useful in certain situations. The priority should be balancing visual quality, compatibility, dimensions, and file size.
Does product photography affect SEO?
Product photography can contribute to a broader SEO and user-experience strategy. Properly optimized images can improve page performance, accessibility, and image discoverability. However, image optimization alone does not guarantee higher search rankings.
Should product images be optimized for mobile?
Yes. Product images should be tested on mobile devices because many customers browse online stores using smartphones. Images should remain clear and useful while being delivered efficiently enough to avoid unnecessary page-loading delays.
Should I use lifestyle photography for my products?
In many cases, yes. Lifestyle photography can help customers understand how a product looks in a real environment and can communicate scale, context, and use cases. It works particularly well for fashion, furniture, beauty, food, accessories, electronics, and lifestyle products.
Can professional product photography improve conversions?
Strong product photography can improve the shopping experience by making products easier to understand and reducing uncertainty. Conversion performance depends on many factors, including price, product quality, trust, reviews, copy, website usability, shipping, and checkout experience, so photography should be considered one part of the complete conversion strategy.
How can I optimize Shopify product images?
Use appropriately sized images, avoid unnecessarily large source files, use efficient image formats where appropriate, provide meaningful alt text, maintain consistent dimensions and composition, and review how product media loads on both desktop and mobile. For deeper storefront optimization, a technical Shopify performance audit can identify additional issues.